Archive
SharePoint Online How To Search and Display Custom Metadata
Handling custom columns in search in Office 365 / SharePoint Online isn’t the easiest of processes and there are a number of things that can easily throw you.
The net result will be one of three things:
- Site columns not displayed in custom display templates.
- Site Columns not refinable.
- Site columns not searchable.
These three symptoms are all loosely related and stem from not setting up your search schema and result types correctly.
Search has many moving parts in it and to make matters worse the options available differ between SharePoint Online and SharePoint On Premise.
I’ll look at the three issues in more depth before moving onto how to configure a column so it is displayed, refinable and searchable.
Setting up a CDN
Quick one to show how we handle DevOPS here at Simple Innovations.
The challenge is to set up a Content Delivery Network (CDN) in Azure so that all of the images on our new web site can be served as close to the end user as possible.
The classic DevOPS method would be to start from script and get it just right but in this case we only need to do it once so why not use the Azure portal to do it?
Exposing Azure Web Site slot specific variables in a .Net Core ASP 1.1 MVC Web Application
Try saying that five times very fast.
It all started simply enough as I go through my Azure development exams in particular the Developing Microsoft Azure Solutions 70-532.
All I needed was to understand how Azure Deployment Slot Specific App Settings worked. I had read it up but wanted to see it in action.
How hard could it be?
As it turns out not too bad when you understand it but there were two things I hadn’t appreciated.
- ASP.NET Core 1.1 uses a different mechanism for application settings.
- The way that Azure represents deployment slots in the portal.
ASP.NET Core 1.1 Application Settings
In a nutshell web.config is no longer available and you should use an alternative mechanism such as an appsettings.json file. For a good write up see here
New Configuration and AppSettings for MVC6 – Web.config is Gone
Its all really good news in this is that the new way of doing things frees us from the tyranny of named files and opens up dependency injection, combining multiple files, overrides at runtime, secure secret stores. It is a good thing but first you must get your head above it.
Azure Deployment Slot Portal Representation
I assumed that the deployment slots would be a child of the web site in the Azure portal but this is not the case. Instead each slot is its own web site with links between them. This does make sense as that is what they really are a set of web sites with arbitrary links between them. Those parts that are hosted on the same VM under the hood share their settings so that updating one will update all of them whilst those that are slot specific do not affect each other.
In the end a solid day of digging got me to the bottom of this and a better understanding of how Azure is put together.
Adding the org chart back into a SharePoint 2013 My Site
One thing everyone loved about the SharePoint 2010 my sites was the Silverlight Organisation chart.
It seems to have been dropped from SharePoint 2013, my guess as Silverlight is no longer flavour of the month.
However its still there on the \organizationview.aspx page in the My Site Host Collection Site.
All we need to do to bring it back is modify the quick navigation and add a link to it and hey presto!
We can do this via the GUI or we can use PowerShell to do this.
Using the GUI
Log onto the my site root site as a site collection administrator.
Select the ‘Gear Wheel’
Select ‘Site Settings’.
Under ‘Look and Feel’ select ‘Quick Launch’.
Select ‘New Heading’.
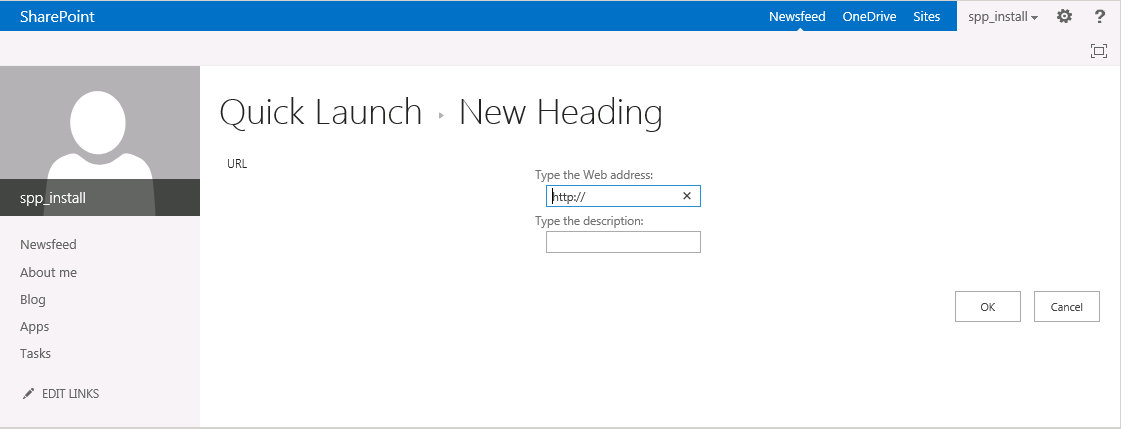
Set the web address to ‘http://<my site host collection root site URL>/organizationview.aspx’.
Set the description to ‘Organisation Chart’.
Select ‘OK‘.
Using PowerShell
$Web = Get-SPWeb -Identity:“http://<my site host collection root site URL>/”
$Navigation = $Web.Navigation.QuickLaunch
$Node = New-Object `
-TypeName:“Microsoft.SharePoint.Navigation.SPNavigationNode” `
-ArgumentList:“Organisation Chart”, “http://<my site host collection root site URL>/OrganisationView.aspx”, $true
$Web.Navigation.QuickLaunch.AddAsLast($Node)

Enjoy
Sebastian
How to Brand SharePoint 2013 My Sites: Part 3: Applying Site Master Pages
Hi There
So far this series consists of the following posts:
- How to Brand SharePoint 2013 My Sites: Part 1: Using Design Packages
- How to Brand SharePoint 2013 My Sites: Part 2: Adding Design Packages Links via a Feature
- How to Brand SharePoint 2013 My Sites: Part 3: Applying Site Master Pages
We now have a solution that shows links to all of the layouts pages we need to manipulate design packages via the Site Settings page except for Master Pages.
This post shows you how to create a page similar to the OOTB SharePoint Site Master Page Settings that will work in a SharePoint My Site.
Adding the link is simple enough, it is defined in the Publishing feature which is not activated in My Sites, see part 2 for an explanation of probably why not. The Id of the feature is “AreaChromeSettings”.
Easy enough to add the link back we just copy the definition, change its name and add it to our site scoped feature. We deploy and activate the feature and the link is displayed.
However if you do this you’ll just get a blank page.
Digging into this its due to the code behind on the page that is trying to work out which master pages are appropriate and using various parts of publishing to do so. If you check in the ULS logs you’ll see it raises a the following error:
One or more field types are not installed properly. Go to the list settings page to delete these fields.<nativehr>0x81020014</nativehr><nativestack></nativestack>, StackTrace:
at Microsoft.SharePoint.SPListItemCollection.EnsureListItemsData()
Chasing it through via .NET Reflector (or ILSpy) shows that the code behind uses numerous items from the publishing namespace.
Using this page is not an option. Neither is the “Change the Look” page as it won’t show anything other than those pages with a preview page. We could create a mysite.preview page and upload it which would allow us to select the master page this way but doing so means that we are really beginning to change the default site.
The best approach is to write your own Set Master Page application page and provide a link in the Site Settings under look and feel based on the existing link in the Publishing feature.
Once done you can set the master page this way and then create your design package as normal.
Next we will move onto how to automatically band a site when it is created.
Cheers
Sebastian
How to Brand SharePoint 2013 My Sites: Part 2: Adding Design Packages Links via a Feature
Hi There
So far this series consists of the following posts:
- How to Brand SharePoint 2013 My Sites: Part 1: Using Design Packages
- How to Brand SharePoint 2013 My Sites: Part 2: Adding Design Packages Links via a Feature
- How to Brand SharePoint 2013 My Sites: Part 3: Applying Site Master Pages
Continuing on the ‘how to brand my sites’ with minimal programming series. We saw how by typing URLs directly into the browser we could access all of the pages we needed in a my site to create, save and apply a design package, except for setting the master page which we used SharePoint designer to handle. This wasn’t too surprising as these pages are in the _layouts folder which is available to every site. However it was a bit painful compared to using the Site Settings page to access them. In this post we’ll look at how we can create a purely declarative (no code) feature that puts these links back for us.
To do this we need to examine the features that normally place these links on a site; the features that remove them from My Sites and as a result we’ll understand why they aren’t available by default and also why we can safely add them back so long as we are using Standard edition.
There are two features that put the required links on the Site Settings page:
- SiteSettings, this shows the themes links.
- HtmlDesign, this shows the design settings links.
HtmlDesign is a hidden feature which is part of Publishing which is NOT part of SharePoint Foundation. My Sites are part of SharePoint Foundation however so these do not get activated by default. You can activate them but they have other dependencies on Publishing features and so unless you make every My Site a publishing site this will fail. This behaviour appears to be by design.
I haven’t tried it but gut feel is that making your my sites publishing sites may not be a good idea as it provides users with a more complex interface and also there can easily be a lot of my sites. A five hundred user system might have a hundred publishing content sites and publishing sites use more disk and resource than standard my sites so this would be a significant size increase. Having said this it might be the way you decide to go but even if you do you’ll still be missing the themes links.
SiteSettings is Farm scoped so it is activated in all sites by default and this places the two themes links onto every page. However the MySiteUnifiedNavigation feature then hides these, presumably as without the HtmlDesign links they have little use.
So how do we get these links to show?
Simple we create a new Site scoped feature, copy the relevant CustomAction tags from the features and change the name of them so they will not clash. Then we activate it where we need it and we will have the links, except for the set master page one. We can then use the process in part one of this guide but now navigating via Site Settings to create a design package on our development farm. We can then copy this package to our production farm and either deploy and activate our feature so we can import the design package or, as we tend to do, just use PowerShell to import the design package so that in production things are much more like OOTB SharePoint.
However we have not finished yet there are still a few more tasks to do.
- Give access to the set master page functionality without requiring SharePoint designer.
- Handle the ‘multiple site collection / site’ nature of my sites.
- Brand the sites automatically on creation.
More on this tomorrow.
Cheers
Sebastian
How to Brand SharePoint 2013 My Sites: Part 1: Using Design Packages
Hi Folks
So far this series consists of the following posts:
- How to Brand SharePoint 2013 My Sites: Part 1: Using Design Packages
- How to Brand SharePoint 2013 My Sites: Part 2: Adding Design Packages Links via a Feature
- How to Brand SharePoint 2013 My Sites: Part 3: Applying Site Master Pages
I’ve been asked to brand a SharePoint 2013 On-Premise Farm for a client, a London Law Firm.
Easy enough but there are certain restrictions. The last company that did this produced a very code heavy solution that is now getting difficult to maintain as the company has been bought twice and the internal staff on the project have all left.
Once bitten twice shy so custom code is to be kept to an absolute minimum.
The branding of the Content Sites is easy enough I worked with a designer and we mocked it up using a development farm, saved it to a design package and then used PowerShell to import it to the pilot site.
Then the next sites up where the My Sites. They don’t have the site settings page links to let you get at anything other than the Composed Looks link.
However all of those pages live in the LAYOUTS folder which is available on all sites so we typed the URLs in and off we went.
The mechanism is as you would expect.
- Go to Web Designer Galleries > Themes (use http://mysites.sharepoint.local/_catalogs/theme/Forms/AllItems.aspx) and upload spcolor and spfont files.
- Go to Web Designer Galleries > Master pages and page layouts (use http://mysites.sharepoint.local/_catalogs/masterpage/Forms/AllItems.aspx) and upload master files.
- Go to Web Designer Galleries > Composed Looks (use http://mysites.sharepoint.local/_catalogs/design/AllItems.aspx) and create a new composed look.
- Go to Look and Feel > Change the look (use http://mysites.sharepoint.local/_layouts/15/designgallery.aspx) and select your look.
- Go to Look and Feel > Design Manager (use http://mysites.sharepoint.local/_layouts/15/DesignWelcomePage.aspx) and export your design package.
- OR Go to Create Design Package (use http://mysites.sharepoint.local/_layouts/15/DesignPackageExport.aspx) and export your design package.
- Go to Look and Feel > Import Design Package (use http://mysites.sharepoint.local/_layouts/15/DesignPackageInstall.aspx) and export your design package.
As you can copy the design package between farms you can use step 7 to move your design around.
Things to note:
- You can create a link to the Look and Feel > Master page (use http://mysites.sharepoint.local/_layouts/15/ChangeSiteMasterPage.aspx) but it will just display a blank page. However SharePoint Designer works just fine.
- MySites have three components each of which have to have the design package imported.
- My Sites Host Collection, the root site typically one per farm, uses the mysite15.master.
- My Site, one per user, uses the mysite15.master.
- My Blog, one per user, uses the seattle.master.
- MySites component sites all have different WebTemplate.
- My Sites Host Collection, SPSPORTAL#0.
- My Site, SPSPERS#2.
- My Blog, one per user, BLOG#0.
Tests show that this works perfectly, exactly as you would expect however cutting and pasting all those URLs is not fun.
The next post in this series will explain how a small declarative feature can make this much easier.
Cheers
Sebastian
Developers only tend to see what helps them do development
A quote from Gina Holden who has dealt with developers for longer than anyone should really have to.
It came up in discussion about what is agile programming, or rather what is Agile?
I pointed her to the original Agile Manifesto and her comment was:
Sounds great and practical apart from “Customer collaboration over contract negotiation” – that’s just stupid and naive.
We then had a little discussion about the difference between ‘over’ and ‘instead of’ and I pointed out that most developers treat the right hand side (or RHS as we techies like to call it) as BAD whilst the left hand side (or LHS) as GOOD and that this was not the point. The aim is really LHS GOOD, RHS GREAT.
This then gave rise to the fantastic quote from Gina:
Developers only tend to see what helps them do development – not what the rest of the project is doing……
And this gave me pause.
I think of Agile as a thing in itself but really it’s just part of the development chain, scrub that, it’s part of the delivery chain, scrub that it’s a way of looking at the whole project.
Yes the whole project. Not just definition, not just development, not just deployment. It’s a way of looking at the entire lifecycle from cradle to grave, of an idea. It could all be agile from having the idea to delivering the first version to sun setting the final version.
With this in mind and bearing in mind we have just started on an idea
Help people get places via public transport
maybe we should be doing it.
More to follow.
Cheers
Sebastian
Deploying Development Releases to Real Android Real Devices
The very first version of Transports of Delight, a useful travel companion Android App, is ready to be deployed to our real Android devices for testing.
This is a very minimal featured release being used prototype our development, test and deploy processes.
So how did it go?
Not well at all.
Why?
Well it turns out Microsofts Hyper-V engine does not support USB devices. This means the ADB (Android Development Bridge) cannot access the test machine to install the software.
So what are my options?
- Copy the .adk files via:
- Copy from development machine workspace\<Project>\bin to a physical machine transfer share.
- Copy from the transfer share to a USB drive.
- Attach the USB drive to the target Android device.
- Copy from the USB drive /mnt/usbhost1 to the relevant area, e.g. a backup area.
- Restore the apk backup
- Install the development environment on a physical machine.
So option 2 it is.
This is when the mantra Marcus and I have been chanting in SCRUM meetings for years now shows it’s true worth.
“Deploy Early, Deploy Often”.
Cheers
Sebastian
